...you'll have to scramble a few eggs. (Words of wisdom by Papa Salz.) And man alive, this place sure is scrambled right now!!!
I realized this weekend how long it's been since our last post, but it certainly isn't for lack of work or progress. Here's a little update on where we've been in the last three weeks...
Work time since last post: 95 hours, 50 minutes, plus shopping
(WOW...thanks to some
awesome late nights and full days spent with tile...)
HUGE check in the box - the tile floor in the bathroom is
this close to being done! She needs a coat of sealer this week, but she's awesome. And she's taken a
lot longer to get done than we anticipated. The process (which was educational and
very painful to the knees) went a little bit like this:
1. We were (thankfully) convinced by a flooring dude at Lowe's that we should
not attempt to remove the old linoleum floor, partly because it would take forever, be messy, and involve removing a whole lot of dried glue...but mostly because it is not advised to disrupt old linoleum glue that may or may not been applied prior to 1970 due to potentially harmful substances in the glue. We really think this floor was installed long after that date, but we wanted to play it safe, and now any potential harm is sealed under a quite a few new layers of material. Once that decision was out of the way, we had to cover the linoleum with a layer of thin set...

2. And then some backer board to give it a nice flat surface for the tiles. The difficult parts of this involved cutting the circles in the cement board for the toilet and water lines....and then putting in the d#*$ screws, which just wouldn't lie flat until they were drilled in, removed, cleaned out, drilled in again (and sometimes the process was repeated). We've since learned that there is a handy tool for this, but hardware stores were long closed by *ahem* 3am when we started this stage of the process.

3. After a practice run to confirm placement and plenty of measuring, chalk lining, remeasuring, and check with the level-ing, we were ready to tile. Our brother-in-law, Chuck, was generous enough to come out to help us with this step. Jeff's sister, Cheryl, and their three kids came along too and were excellent helpers after their trip to the apple orchard. Anika rocked out by cutting tiles of the mesh, Benjamin was a master mesh-remover, and Micah provided insight into our misuse of the term "diamond" for the smaller tile pieces. ("Guys, those are
squares!!!" Smart little guy.)
4. The next day we put on the finishing touches and left it to set for a few days. This Saturday we made an awesome tag team with the grout - Jeff placed the grout as I sponged out the extra (saying "Oh my gosh, this looks awesome!!!" every few minutes).
5. Once we gave it a final cleaning the next day...
Isn't she beautiful?!?! We were pretty sad to realize that between the toilet, vanity, a little throw rug or a bathmat for the shower...not a whole lot of this work of art will actually be showing. But I've been enjoying sitting on the edge of the bathtub and checking out the scenery for now. I'm pretty darn proud of this one. Is it perfect? No....but it's
ours.
But that's not all we've been up to! Oh no!!! We finished cleaning out the master bedroom, whose contents now all reside right here in the blue room. (OH! And update on the paint colors...they have grown on me BIG TIME and I can't wait to see the rooms in their final state. I'm so glad that Jeff, the thoughtful one, encouraged me, the rash fix-it-now one, to chill out and live with them for a while. He's a smart guy, too!)
The master is all primed, and...7 paint samples later...we picked our color for the room. With all the brighter colors going on in the other rooms, we picked a nice, peaceful, brown/tan/beige for this room. I can't wait to liven it up with some red decor from our wedding gifts - and maybe a few other colors, too. Turquoise? Yellow?
And...did you notice the relative absence of green tape in this room? That's right, I worked up the patience to give sans-tape painting a try, and it went fairly well. The picture rail was driving me bonkers, so that got a little tape around the bottom edge, but the hours and hours of painting are paying off with a steady hand. I'm
so excited to
not peel tape after this room is done.
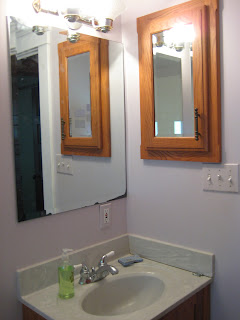
We've finally started working on a few of the details, like changing out the light switches and electrical outlets. They're all a little sad and painted over a million times, so it's really about time. How much prettier is this one in the bathroom? It even needed a little re-ordering of the switches for optimal positioning, which we safely accomlished. (I must have asked "Are you
sure the power is off?" about a million times, but better safe than sorry!)
As for the carpet, we were fairly set on what we wanted (at least narrowed down to two options...did you know they can make carpet out of corn now? Very Ann Arbor), and we wanted to hurry up and get it in before the family comes in a couple of weeks. But that would have been a
huge rush for a pretty expensive purchase...and that was also before I peeled back the carpet in the master bedroom to reveal some
beautiful (but covered in carpet glue and definitely needing some love) hardwoods. The whole upstairs has them, and now I'm on the "if we're going to spend the money, let's get these hardwoods out in the open" boat. We'll have a pro come check it out when the painting is done and take a little more time/budgeting for that decision later.
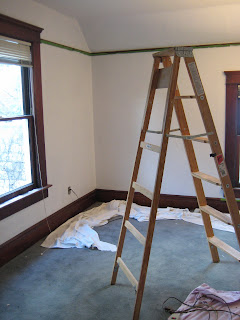
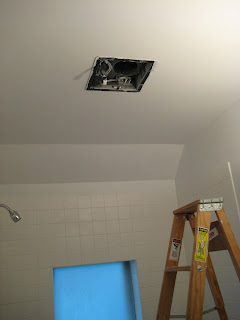
There's still plenty left to do upstairs, and we have T minus 10 days to get quite a bit of it done. Even
after we've cleaned up for the day, the hallways still looks a little bit like this:
It's amazing to see some real progress on the major tasks, though...so we'll just keep on scrambling and hope for an omelet soon!!